Burgundy is the ultimate fall nail color. It’s rich, bold, and effortlessly chic, perfectly embodying the warmth and depth of autumn. Whether you prefer simple elegance or intricate nail art, burgundy offers endless versatility. From glossy finishes to matte tones, and from minimalist styles to dazzling embellishments, there’s a design to suit every mood and occasion.
In this collection of 34 stunning burgundy nail designs, you’ll find inspiration for embracing fall’s cozy yet glamorous vibe. Get ready to make a statement with these gorgeous ideas that will have you reaching for your favorite nail polish!
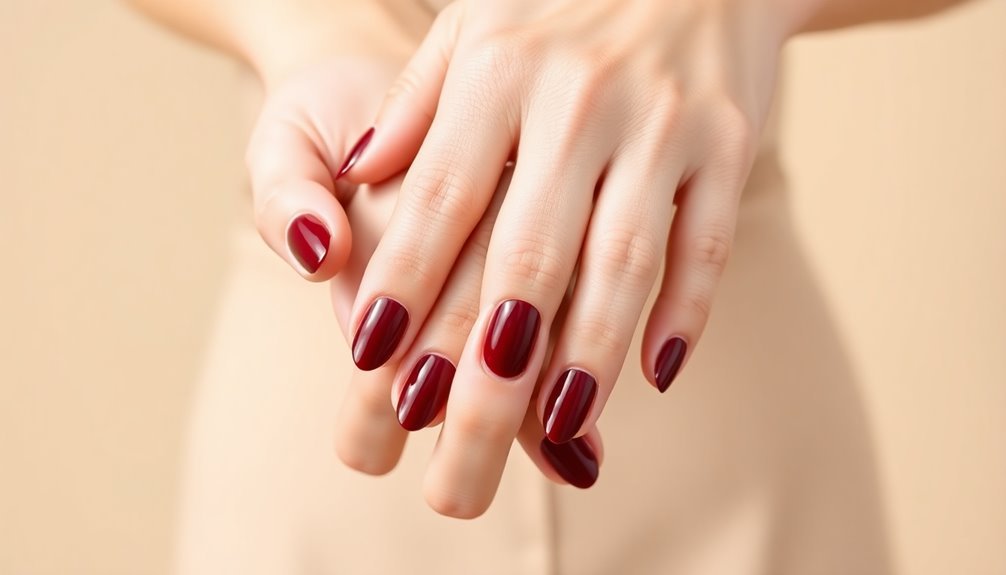
Classic Burgundy Matte

We’ve discovered that the secret to making this look last is in the prep work – buffing nails gently and pushing back cuticles creates the ideal canvas. For extra staying power, we’ll cap the free edge of each nail with polish, a technique known as “wrapping the tip.”
Burgundy French Tips

Don’t forget to seal your work with a good top coat – we recommend Seche Vite for its glass-like finish.
“The key to long-lasting French tips is in the top coat application,” explains NYC-based nail technician Maria Rodriguez. “Make sure to ‘cap’ the free edge by running the brush along the tip of the nail.”
Also Read: 25 Blue Fall Nails for a Cool Seasonal Look
Gold Glitter Accent Nails

To blend the burgundy and gold seamlessly, we can add tiny gold glitter touches to the other nails using a small detail brush. This technique, known as “sparkle diffusion” in the industry, creates cohesion across the entire manicure.
We’ll seal everything with a high-shine top coat, which not only protects our design but also enhances the glitter’s dimensional effect. Pro tip: Use a peel-off base coat under the glitter nail for easier removal later.
Burgundy Marble Design

Creating a stunning marble effect on burgundy nails adds sophistication to this fall manicure. We’ll start with a deep burgundy base coat like OPI’s “Malaga Wine,” which celebrity nail artist Tom Bachik calls “the perfect canvas for marble designs.” After the base dries completely, we’ll use a thin detail brush to create delicate white veining that mimics natural stone patterns.
For the marbling technique, we’re going to mix white gel polish with a clear top coat at a 1:2 ratio, which gives us the ideal consistency for creating those signature wispy lines. “The key to realistic marble effects lies in varying the pressure and thickness of your strokes,” explains Sarah Gibson, lead educator at The Nail Academy. We’ll drag the brush in random, organic patterns across each nail, making sure some lines intersect while others fade out naturally. Don’t worry if they’re not perfect – real marble isn’t either! Once we’ve achieved our desired pattern, we’ll seal everything with a high-gloss top coat that’ll make the design pop.
Pro tip: adding a touch of gold striping tape between some of the marble lines creates an extra layer of luxury that’s perfect for fall.
Also Read: 37 Gorgeous Brown Nail Designs You’ll Adore
Chrome Burgundy Elegance

For the best results, we’re sealing our chrome masterpiece with a no-wipe top coat, which prevents smudging and extends wear time up to two weeks.
Don’t forget to clean any excess powder from around your cuticles with a small brush – this attention to detail makes the difference between amateur and professional-looking results.
Burgundy Negative Space Art

Negative space’s artistic potential shines brilliantly with burgundy nail designs. Let’s explore how leaving strategic portions of your natural nail bare creates striking geometric patterns that complement deep wine-colored polish. “Negative space nail art has become increasingly sophisticated, with burgundy being one of the most flattering colors for this technique,” notes celebrity nail artist Maria Chen.
We’ll start by applying a clear base coat, letting it dry completely before mapping out our design with thin striping tape. When working with burgundy polish, we recommend OPI’s “Black Cherry Chutney” or Essie’s “Bordeaux” for their rich, dimensional color payoff. Once we’ve placed the tape in our desired pattern, we’ll paint the exposed areas with two thin coats of burgundy polish.
“The key is waiting until each layer is completely dry before removing the tape,” advises master nail technician James Park, “this guarantees clean, crisp lines.”
Don’t forget to seal your masterpiece with a high-shine top coat, carefully applying it without disturbing the clean edges of your negative space design. The contrast between polished and bare sections creates a modern, architectural effect that’s perfect for fall.
Foil and Burgundy

Let’s start by applying two coats of a deep burgundy polish – we recommend OPI’s “Black Cherry Chutney” or Essie’s “Bordeaux.” Once that’s completely dry, we’ll apply foil adhesive in our desired pattern, whether it’s geometric shapes, abstract swirls, or classic French tips.
Professional nail technician Sarah Chen suggests: “Wait exactly 60 seconds after applying the adhesive before pressing the foil transfer.” We’ll then firmly press rose gold or copper foil onto the sticky areas, creating that eye-catching metallic accent.
After sealing with a quality top coat (Seche Vite works wonderfully), we’ve got a manicure that perfectly balances classic autumn sophistication with modern metallic flair.
Burgundy Geometric Patterns

Let’s start with a burgundy base coat (we recommend OPI’s “Black Cherry Chutney” or Essie’s “Bordeaux”), allowing it to dry completely. Using a thin striping brush or nail tape, we’ll create clean lines and shapes with metallic gold, matte black, or cream polish. “The key to perfect geometric patterns lies in patience and precision,” explains master technician Sarah Chen, who suggests using a top-quality detail brush like the BLAQ Slayer 000.
We can combine triangles, diamonds, and straight lines across different nails, keeping some solid burgundy for balance. Don’t forget to seal your design with a high-shine top coat – Seche Vite’s quick-dry formula works wonders for preserving these intricate patterns without smudging.
Velvet Burgundy Effect

For added dimension, we’ll apply a second coat using the same magnetic technique but positioning the magnet in a slightly different direction. “This cross-pattern application creates depth that mimics actual velvet fabric,” explains nail technician Sarah Chen.
Burgundy Crystal Accents

Don’t forget to seal your crystal work with a top coat that’s specifically designed for embellishments. “The key is applying the top coat around the crystals, not over them,” explains master nail educator James Lee, “this preserves their sparkle while protecting the overall design.” We’ve found that Kiara Sky’s Non-Wipe Top Coat works exceptionally well for this technique.
Don’t forget to seal your crystal work with a top coat that’s specifically designed for embellishments. “The key is applying the top coat around the crystals, not over them,” explains master nail educator James Lee, “this preserves their sparkle while protecting the overall design.” We’ve found that Kiara Sky’s Non-Wipe Top Coat works exceptionally well for this technique.
Burgundy Leaf Art

Autumn’s signature motif transforms burgundy nails into seasonal masterpieces through delicate leaf designs. We’ll show you how to create stunning maple, oak, and aspen leaf patterns using a deep wine base and metallic accents that capture fall’s essence perfectly.
Let’s start with a rich burgundy base like OPI’s “Malaga Wine,” which celebrity nail artist Tom Bachik calls “the perfect canvas for autumnal art.” Using a fine detail brush, we’ll paint delicate veining patterns in gold or copper polish, creating realistic leaf structures that seem to flutter across each nail. For added dimension, we’re incorporating subtle ombré effects where the leaves appear to fade from burgundy into amber tones.
“The key to realistic leaf art lies in asymmetry and organic lines,” explains nail technician Sarah Chen, NCEA certified. We’ll use dotting tools to add texture points along the leaf veins, and a touch of matte top coat helps create that authentic fallen leaf appearance. Don’t worry if your leaves aren’t perfect – nature isn’t either! For best results, we recommend starting with larger leaf designs on accent nails before attempting more intricate patterns across all fingers.
Wine Ombré

A seamless wine ombré elevates burgundy nails with a sophisticated gradient that shifts from deep bordeaux to soft rosé hues. We’ll need to start with a solid burgundy base coat, and celebrity nail artist Maria Rodriguez suggests using OPI’s “Malaga Wine” as our anchor shade.
Let’s create the perfect fade by working with a makeup sponge and three complementary wine shades: deep burgundy, medium merlot, and light rosé. We’re going to paint stripes of each color onto the sponge, overlapping them slightly for that seamless progression. “The key to a flawless ombré is working quickly while the polish is wet,” explains Rodriguez, who’s created looks for numerous fashion magazines.
To execute the technique, we’ll dab the sponge gently onto each nail, moving from the tip to the base. Don’t worry if the first layer isn’t perfect – we’ll need 2-3 applications to achieve that rich, dimensional effect. Between layers, let’s wait 2 minutes for proper drying time. Once we’re satisfied with the gradient, we’ll seal our artwork with a high-shine top coat to protect our wine-inspired masterpiece.
Burgundy Animal Print

Sophisticated burgundy animal prints regularly turn heads by combining the richness of wine-colored polish with wild patterns. We’ve found that this striking design works incredibly well for fall, especially when we layer dark burgundy shades like OPI’s “Black Cherry Chutney” with metallic accents.
To create this look, we’ll start with a burgundy base coat, letting it dry completely before applying our animal print patterns. Celebrity nail artist Tom Bachik suggests, “Using a thin striping brush, create irregular spots or stripes with a slightly darker shade, like Essie’s ‘Wicked,’ to achieve that authentic animal texture.” We can enhance the design by adding small details with a gold striper polish, which helps accentuate the pattern’s edges.
For those who aren’t confident in their freehand skills, we recommend using nail stamping plates specifically designed for animal prints. “The key to perfect burgundy animal prints is contrast,” explains nail educator Sarah Thompson, “so don’t be afraid to mix in some lighter wine tones for dimension.” Finally, we’ll seal our masterpiece with a high-shine top coat to maintain our wild side’s sophistication for up to two weeks.
Burgundy Stiletto Nails

We’ve found that maintenance is vital with this style. You’ll need regular filing to prevent snags, and we recommend applying a quality top coat every three days to maintain shine.
For those who aren’t ready for extreme length, we can opt for a medium stiletto that’s more wearable for daily activities. The burgundy shade works beautifully with gold accent nails or subtle glitter tips, giving us versatility in styling options.
Holographic Burgundy

Holographic burgundy’s eye-catching dimension creates a stunning twist on classic fall nails. We’ve seen this mesmerizing effect capture attention across social media, and it’s not hard to understand why – the multifaceted shimmer transforms traditional burgundy into something truly spectacular.
To achieve this look, we’ll start with a deep burgundy base coat like OPI’s “Black Cherry Chutney,” followed by a holographic top powder or specialized polish. “The key is building thin, even layers to maximize the rainbow effect,” explains celebrity nail artist Maria Chen. She recommends using Born Pretty’s Holographic Powder or ILNP’s “Wine Not” for the most striking results.
When applying the holographic element, we’ll want to work in a well-lit area to guarantee even coverage. After the base color dries completely, use a silicone brush to gently buff the powder into the surface, or apply two thin coats of holographic polish. Remember to seal everything with a quality top coat – we love Seche Vite’s quick-dry formula. The result? A sophisticated burgundy that shifts and sparkles with every movement, perfect for everything from office meetings to fall festivities.
Burgundy Floral Details

While holographic finishes dazzle on their own, adding delicate floral designs to burgundy nails creates an entirely new level of artistry. We’re seeing nail artists combine deep wine-colored bases with hand-painted roses, delicate autumn leaves, and intricate botanical patterns that perfectly capture fall’s romantic essence.
To achieve this look, we’ll start with two coats of a rich burgundy polish like OPI’s “Malaga Wine” or Essie’s “Bordeaux.” Once that’s completely dry, we’ll use a fine detail brush and contrasting colors like gold, cream, or dusty rose to paint our florals. “The key to successful nail art is patience and a steady hand,” explains celebrity nail artist Maria Chen, who recommends practicing designs on paper before attempting them on nails.
For those of us who aren’t quite ready for freehand designs, we can use nail stamping plates with floral patterns or apply delicate burgundy nail decals. We’ve found that adding a matte top coat over these floral designs creates an especially sophisticated look that’s perfect for autumn events, and as nail technician Sarah James notes, “The contrast between matte and glossy elements makes the florals really pop.”
Wine Coffin Nails

Among fall’s most striking nail trends, wine-colored coffin nails have emerged as a show-stopping choice for those seeking dramatic elegance. “The elongated coffin shape paired with deep burgundy creates an incredibly sophisticated look that’s perfect for autumn,” says celebrity nail artist Maria Chen, who’s worked with countless A-list clients.
We’re seeing the most stunning results when clients opt for OPI’s “Black Cherry Chutney” or Essie’s “Bordeaux” as their wine-colored base. To achieve this look, we’ll want to start with properly shaped coffin tips – remember to file at a 45-degree angle for that perfect tapered edge. After applying a quality base coat, we’ll need two to three thin layers of our wine-colored polish, allowing each coat to dry completely.
What’s really making these wine coffin nails stand out this season is the incorporation of subtle shimmer topcoats. “Adding a fine burgundy shimmer creates depth without overwhelming the classic wine tone,” notes Jennifer Ross, lead technician at The Nail Academy. For extra longevity, we’re recommending a gel version of these shades, which can last up to three weeks with proper care and maintenance.
Burgundy Metallic Swirls

Don’t worry if your first attempts aren’t perfect – we’ve found that slightly imperfect swirls often create the most interesting designs.
For extra longevity, we’re sealing our work with a gel-like topcoat such as Seche Vite’s Quick Dry formula, which enhances the metallic shine while protecting those carefully crafted swirls.
Textured Burgundy

Want something more dramatic? We can apply a magnetic polish in burgundy, holding the magnet over wet polish to create rippling patterns. “The key to perfect texture is patience,” advises celebrity manicurist David Thompson. “Let each layer dry completely before adding the next effect.”
Don’t forget to seal your textured design with an appropriate top coat that won’t diminish the dimensional effect you’ve created.
Burgundy Plaid Design
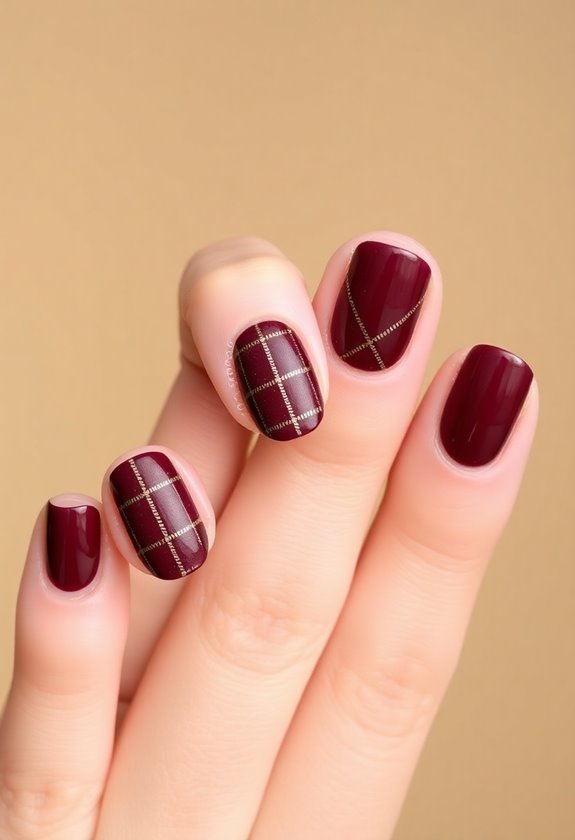
Don’t forget to seal your plaid masterpiece with a high-quality top coat like Seche Vite, which will protect the design and add impressive shine.
For those new to nail art, we recommend practicing the pattern on paper first or starting with an accent nail before attempting a full set.
Wine Glass Effect

The key to perfecting this look, according to master technician Sarah Chen, is “patience and precise magnet placement.” We’ll seal everything with a high-shine top coat, which enhances the dimensional effect and adds lasting durability.
Don’t forget to clean up any edges with an angled brush dipped in acetone for that professional finish. When done correctly, this design catches the light beautifully and creates an almost 3D appearance that’s perfect for fall gatherings.
Burgundy Almond Shape

Looking to elevate your fall manicure? The burgundy almond shape is turning heads this season, and we’re seeing nail technicians everywhere embracing this sophisticated silhouette paired with rich wine-colored polish.
“The almond shape elongates the fingers while the burgundy shade adds that perfect touch of fall drama,” says celebrity nail artist Maria Chen, who’s worked with countless red-carpet clients. We’ll want to start with properly prepped natural nails, filing them into a tapered point that’s slightly rounded at the tip. For the perfect burgundy shade, we’re loving OPI’s “Black Cherry Chutney” or Essie’s “Bordeaux,” which both deliver that deep, wine-inspired finish that’s quintessentially autumn.
The key to nailing this look lies in the precision of the almond shape, which should mirror the natural curve of your cuticles. We’ll need to file at a 45-degree angle on both sides, gradually working towards the center point. Remember to keep the length wearable – master nail technician James Lee suggests “maintaining about 1/4 inch beyond the fingertip for everyday elegance while still achieving that coveted almond silhouette.”
Glitter Gradient Burgundy

Sparkle-seekers have discovered the perfect way to add dimension to classic burgundy nails with a mesmerizing glitter gradient effect. We’re seeing more nail artists create this stunning look by layering fine glitter over a deep burgundy base, gradually intensifying the sparkle from cuticle to tip. “The key to a flawless gradient is working with ultra-fine cosmetic-grade glitter in complementary tones,” explains celebrity nail artist Sarah Chen.
Let’s break down how we’ll achieve this eye-catching style. First, we’ll apply two coats of a rich burgundy polish like OPI’s “Black Cherry Chutney” or Essie’s “Bordeaux.” Once that’s dry, we’ll use a makeup sponge to dab on a mix of rose gold and copper glitter, starting lightly at the base and building intensity toward the tips. Professional nail tech Maria Rodriguez suggests, “Work in small sections and seal with a quick-dry top coat between layers to prevent fallout.” We’ll finish with two layers of clear top coat to maintain our glitter stays perfectly suspended and smooth. This technique works particularly well for fall events, as it catches the light beautifully in autumn’s golden hour.
Burgundy Abstract Art

Across trendy nail salons, abstract art designs have emerged as a fresh way to elevate burgundy manicures. We’re seeing nail artists create stunning geometric shapes, organic swirls, and bold brushstrokes using deep wine hues as their base color. “Abstract nail art allows for creative freedom while maintaining sophistication,” says celebrity nail artist Maria Chen, who’s worked with multiple A-list clients.
Let’s create this look at home with a few professional techniques. We’ll start with two coats of a rich burgundy polish (we recommend OPI’s “Black Cherry Chutney” or Essie’s “Bordeaux”), letting each layer dry completely. Using a thin nail art brush, we’ll add abstract elements with metallic gold, white, or black polish.
Professional nail tech Sarah Wong suggests, “Keep your hand steady and don’t overthink the patterns – abstract art is meant to be spontaneous and unique.” For best results, we’ll seal our masterpiece with a high-shine top coat, which not only protects the design but also enhances the burgundy’s depth. Remember to let each element dry between applications to prevent smudging and maintain crisp lines in your abstract design.
Burgundy Cat Eye

While classic burgundy polish makes a stunning statement on its own, the magnetic cat eye effect takes this shade to hypnotic new levels. We’re seeing more nail artists create this mesmerizing look using specialized magnetic burgundy polishes, which contain ultra-fine metallic particles that align when exposed to a magnet.
To achieve this look, we’ll start with a black base coat, which helps the burgundy cat eye effect pop more dramatically. After it dries, we’ll apply our magnetic burgundy polish – we recommend Born Pretty’s “Wine Hypnotic” or Mooncat’s “Bordeaux Galaxy.” The key is holding the magnet at a 45-degree angle for 10-15 seconds while the polish is still wet. “The longer you hold the magnet, the more defined your cat eye effect will be,” explains celebrity nail artist Maria Rodriguez.
For best results, we’ll seal everything with a quick-dry top coat, being careful not to smudge the magnetic pattern. Don’t worry if you don’t get it perfect on the first try – these polishes are forgiving, and you can always remagnetize the wet polish until you achieve your desired effect.
Mixed Finish Burgundy

Don’t forget to seal your work with a quality top coat on the glossy nails, keeping the matte ones separate.
“The key to mixed finishes is strategic placement,” notes master technician Sarah Chen. “Try matte on the ring finger and thumb, with glossy and metallic finishes alternating on remaining nails for a balanced look that’s both edgy and elegant.”
Burgundy Pearl Accents

Adding pearl accents to burgundy nails creates a sophisticated twist on the classic fall shade. We’ve found that combining these elements brings an elevated dimension to your manicure, especially when you’re looking for something more refined than basic burgundy polish.
Let’s start with a base of deep burgundy polish (we recommend OPI’s “Malaga Wine” or Essie’s “Bordeaux”), applying two thin coats for ideal coverage. “Pearl accents work best when they’re strategically placed,” says celebrity nail artist Sarah Chen, “typically on just one or two nails per hand for maximum impact.” We can create these accents using either pearl-finish polish or actual pearl embellishments, which you’ll want to secure with clear top coat.
For the most professional-looking results, we suggest applying tiny pearl studs along the cuticle line or creating a diagonal stripe across each accent nail. Don’t forget to seal everything with a quick-dry top coat – our go-to is Seche Vite, which helps prevent the pearls from catching on fabric. The combination of rich burgundy with pearlescent accents creates a look that’s both seasonally appropriate and subtly glamorous.
Wine Dotted Design

We recommend starting with larger dots near the cuticle, gradually decreasing the size as you move toward the tip. For best results, we’ll place three to five dots in a diagonal pattern across each nail. Don’t worry about perfect symmetry – slight variations make the design more organic.
Burgundy Snake Pattern

Though snake patterns might seem complex, creating this sophisticated design requires just two shades of burgundy and a thin striping brush. We’ll start with a deep burgundy base coat, like OPI’s “Malaga Wine,” and let it dry completely before adding our snake pattern details.
For the pattern itself, we’ll use a lighter burgundy shade, such as Essie’s “Berry Naughty,” to create overlapping curved lines. “The key to authentic-looking snake patterns is varying the thickness and spacing of your curves,” says celebrity nail artist Maria Chen. Using our thin striping brush, we’ll paint S-shaped curves that connect and intersect, leaving negative space between them to create that classic reptilian effect.
Once we’ve mapped out our basic pattern, we’ll add small dots and dashes along the curves to mimic snake scales. Celebrity manicurist Tom Bachik suggests, “Work in small sections and don’t worry about perfect symmetry – natural snake patterns aren’t perfectly uniform.” We’ll seal our design with a quick-dry top coat, which will enhance the burgundy tones while protecting our intricate pattern for up to two weeks of wear.
Burgundy Half Moon

The half moon’s elegant curves make burgundy polish pop with vintage-inspired flair. We’ll guide you through creating this timeless look that celebrity nail artist Maria Thompson calls “a perfect marriage of classic and contemporary.” The design features a pristine half-circle at the nail’s base, contrasting beautifully with rich burgundy polish on the rest of the nail.
To achieve this look, we’ll start by applying circular reinforcement stickers at the base of each clean, prepped nail. “The key is precise placement,” says Thompson, “about one-third up from the cuticle.” We’re using OPI’s “Black Cherry Chutney” for that deep burgundy shade, applying two thin coats for ideal coverage. After the polish dries completely, we’ll carefully remove the stickers to reveal clean half-moons.
Professional tip: Seal your design with a quick-dry top coat that won’t smear the crisp lines. We recommend Seche Vite’s fast-drying formula, which nail technician Lisa Chen praises for its “glass-like finish and exceptional durability.” Don’t forget to clean any polish from your cuticles with an orange stick for that salon-perfect finish.
Wine Quilted Nails

For the quilted effect, we’ll add intersecting lines to create diamond shapes, then dot each intersection with a tiny pearl or rhinestone. A quick-dry topcoat seals everything while adding that coveted gel-like shine.
Remember to let each layer dry completely – imperative for preventing smudges in this detailed design.
Burgundy Lace Pattern

Moving from quilted elegance to intricate details, burgundy lace patterns offer a sophisticated twist on classic nail art. We’ll create this romantic look using a deep wine base coat and delicate white lace designs that perfectly capture fall’s refined aesthetic.
Let’s start with two coats of OPI’s “Black Cherry Chutney” or Essie’s “Bordeaux” as our burgundy foundation. “The key to lace patterns is letting each layer dry completely,” says celebrity nail artist Maria Chen.
We’ll use a fine detail brush and white gel polish to paint delicate swirls and connected patterns that mimic antique lace. Don’t worry if they’re not perfect – slight irregularities add to the handcrafted appeal.
For best results, we recommend using a nail stamping plate with lace designs if you’re new to intricate patterns. Apply the design to just one or two accent nails, keeping the others in solid burgundy for a modern take. Finish with a high-shine top coat to seal your design and add dimension. “The contrast between deep burgundy and white lace creates an elegant manicure that’s perfect for autumn formal events,” notes salon owner Jessica Martinez.
Burgundy Glass Tips

Stunning glass tips create a modern edge when paired with rich burgundy polish, offering a fresh take on the traditional French manicure. We’re seeing this trendy technique gain popularity in upscale salons, where nail artists use specialized aurora powder and gel topcoats to achieve that signature translucent effect.
To create burgundy glass tips at home, we’ll start with a neutral base coat before applying our favorite burgundy shade, like OPI’s “Malaga Wine” or Essie’s “Bordeaux.” Celebrity nail artist Sarah Thompson explains, “The key to perfect glass tips lies in the proper application of aurora powder and a high-quality gel topcoat.” We’ll carefully apply the powder using a silicone tool, focusing on the tips while maintaining a clean line where the burgundy meets the glass effect.
Let’s seal our design with two layers of non-wipe gel topcoat, making sure to cure between each layer for maximum shine and durability. The finished look combines sophisticated burgundy with eye-catching glass tips that catch the light beautifully, making it perfect for both office meetings and evening events this fall season.
Wine Tortoise Shell

The classic tortoise shell pattern takes on a rich, seasonal update when reimagined in wine-colored hues. We’re seeing this sophisticated design emerge as one of fall’s most requested nail art trends, combining deep burgundy, amber, and mahogany shades to create that signature mottled effect.
To achieve this look, we’ll start with a burgundy base coat, like OPI’s “Malaga Wine,” letting it dry completely. Next, we’ll use a small detail brush to create irregular patches with a darker wine shade, such as Essie’s “Bordeaux.” Celebrity nail artist Tom Bachik explains, “The key to authentic tortoise shell is layering translucent colors with varying opacity.” We’ll then add golden-brown spots using a toothpick or dotting tool, allowing them to blend slightly with the burgundy beneath.
For the finishing touch, we’ll seal everything with a high-shine top coat, which nail educator Sarah Thompson notes “adds depth and dimension to the tortoise pattern, making it look more authentic.” The result is a sophisticated take on animal print that’s perfect for autumn’s rich color palette and pairs beautifully with both casual and formal attire.
Frequently Asked Questions
How Long Does Burgundy Nail Polish Typically Last Before Chipping?
We’ve found that quality burgundy polish typically lasts 4-7 days before chipping, but it’ll stay longer with a good base and top coat. Regular household chores can affect longevity, so wear gloves when cleaning.
Can Burgundy Nail Colors Be Mixed to Create Custom Shades?
We can definitely mix burgundy polishes to create custom shades! Try blending dark and light burgundies, or add black for depth and white for lighter tones. Don’t forget to test small amounts first.
Which Skin Tones Look Best With Burgundy Nail Polish?
We’ve found that burgundy nail polish flatters all skin tones beautifully. It looks especially striking on olive and deep skin tones, while creating an elegant contrast against fair skin. Everyone can rock this rich shade!
Does Burgundy Nail Polish Stain Natural Nails?
Yes, we’ve found that burgundy polish can stain nails, especially darker shades. We recommend always using a good base coat to protect your natural nails and prevent any unwanted discoloration from occurring.
What’s the Best Base Coat to Prevent Burgundy Polish From Bleeding?
We recommend using a rubberized base coat like Orly Bonder or CND Stickey Base Coat. They’ll create a strong barrier that prevents burgundy polish from staining your nails while ensuring long-lasting wear.
Conclusion
We’ve explored these stunning burgundy nail designs that perfectly capture fall’s sophisticated essence. From classic matte finishes to intricate marble patterns and gleaming chrome effects, there’s a style that’ll elevate anyone’s autumn look. Whether you’re drawn to the subtle elegance of wine-colored French tips or bold quilted patterns, these burgundy manicure ideas offer endless possibilities to express your style while staying on-trend this season.