
Imagine gazing up at a sky adorned with fluffy, ethereal clouds, each one a soft canvas of dreams and serenity. Now, picture capturing that tranquil beauty on your fingertips with stunning cloud-inspired nail designs. “Dreamy Cloud Nail Designs” explores a collection of mesmerizing styles that bring the whimsical charm of the sky right to your nails.
From delicate pastel hues to intricate patterns that mimic the ever-changing formations of clouds, these designs offer a perfect blend of elegance and imagination. Whether you’re preparing for a special occasion or simply want to add a touch of enchantment to your everyday look, these cloud-themed nails are sure to inspire and delight.
Classic Blue and White Clouds

The classic blue and white cloud nail design creates a dreamy, whimsical look that’s perfect for spring and summer. We’ll start with a pure white base coat, which celebrity nail artist Sarah Thompson says “provides the perfect canvas for dimensional cloud effects.” After the base dries completely, we’re going to use a light blue polish to create our sky backdrop on selected nails.
For the cloud details, we’ll use a small dotting tool or thin brush to paint fluffy white shapes, keeping them soft and rounded. “The key is building layers gradually,” explains master nail technician Jenny Chen, who’s created cloud designs for multiple fashion magazines. We’ll dot white polish in circular motions, letting each layer dry before adding more definition. Don’t worry if they’re not perfect – clouds are naturally irregular!
To enhance the dreamy effect, we’re adding tiny silver sparkles between the clouds using a fine-tipped brush. Finally, we’ll seal everything with a high-shine top coat that professional nail artists vouch for, like Seche Vite or OPI’s Plumping Top Coat, to maintain our cloud design for up to two weeks.
Sunset-Inspired Cloud Dreams

For added drama, we recommend using OPI’s “Coral-ing Your Spirit Animal” as your base and Essie’s “Summit of Style” for subtle shimmer throughout the clouds.
“The secret to realistic clouds is varying their sizes and opacity,” explains nail technician Maria Chen, who suggests using short, curved strokes when painting each cloud formation.
Don’t forget to seal your masterpiece with a high-shine top coat to maintain your sunset clouds’ dreamlike appearance for weeks.
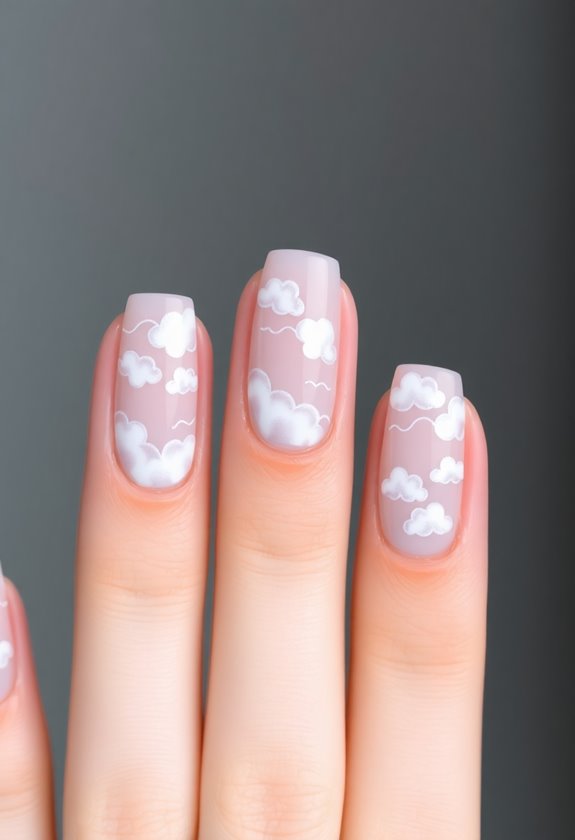
Minimalist Cloud Accents

For maximum impact, we’re placing these delicate clouds strategically – try positioning one near your cuticle and another floating toward the tip. Don’t worry about perfection; slight irregularities make each cloud unique.
A quick-dry top coat will seal your design while maintaining the clean, modern aesthetic that’s signature to minimalist nail art.
Rainbow Cloud Fantasy

To perfect this look, we’re using a combination of regular and holographic polishes – try OPI’s “Bubble Bath” for the base and Essie’s “Rainbow Connection” for sparkle.
The final touch involves adding tiny silver dots as twinkling accents, which master nail artist Tom Lee suggests “bringing the whole celestial fantasy together.” Remember to seal your design with a high-shine top coat for that ethereal glow.
Metallic Cloud Designs

While rainbow clouds capture whimsical fantasy, metallic cloud designs bring sophisticated glamour to nail art. We’re seeing nail artists create stunning effects using chrome powders and metallic polishes in silver, rose gold, and platinum shades to craft ethereal cloud formations that catch the light beautifully.
To achieve this look, we’ll start with a neutral base coat, then use a fine detail brush to paint wispy cloud shapes with metallic polish. “The key is building layers gradually,” explains celebrity nail artist Sarah Chen, “starting with lighter metallic shades and working up to more intense highlights.” We’ve found that Chrome Mirror Powder by OPI works exceptionally well for creating that perfect metallic sheen.
For best results, we recommend applying the clouds in thin, overlapping strokes, letting each layer dry completely. Don’t forget to seal your design with a high-shine top coat – we love Seche Vite’s Quick Dry formula, which enhances the metallic effect while protecting your artwork. The finished look combines the dreamy quality of clouds with the sophistication of precious metals, making it perfect for both special occasions and elevated everyday wear.
Pastel Cloud Paradise

For the perfect cloud-like texture, we’ll need to master the dabbing technique: press gently with the sponge, allowing colors to blend naturally at the edges. Don’t worry about perfect shapes – clouds are naturally irregular.
Top brands like Essie and China Glaze offer excellent pastel collections, but we’ve found that Sally Hansen’s “Miracle Gel” pastels provide exceptional coverage for this technique. Finish with a glossy top coat to seal your dreamy design.
Negative Space Cloud Art

For best results, we’re going to work in thin layers, building up the cloud’s dimension gradually. Don’t worry if your first attempt isn’t perfect – clouds are naturally imperfect!
Add depth by using a light gray polish, like Essie’s Cocktail Bling, to create subtle shadows beneath each cloud. We recommend sealing your design with a quick-dry top coat that won’t smear your artwork, such as Seche Vite’s Dry Fast Top Coat.
Glitter Cloud Magic

For extra dimension, we’ll dust ultra-fine iridescent powder over partially dried clouds using a small eyeshadow brush. Don’t forget to seal your creation with two layers of quick-dry top coat – this locks in the glitter and creates that floating-in-space effect we’re after.
Celebrity nail tech Jamie Wong recommends OPI’s Shine Bright or Essie’s Set In Stones for the perfect glitter consistency.
Monochrome Cloud Patterns
Don’t forget to seal your monochrome masterpiece with a high-quality top coat – we’ve found Seche Vite works beautifully for maintaining the clean lines.
The result is a subtle, professional look that’s office-appropriate yet maintains that dreamy aesthetic we’re all craving.
For best results, we suggest using quick, light strokes and allowing each layer to dry completely.
Neon Cloud Creations

Ready to take your cloud designs from subtle to striking? Let’s explore how neon clouds can transform your nail game with electrifying colors that’ll make your manicure pop against any backdrop.
We’ll start with a fluorescent base coat, where celebrity nail artist Maria Rodriguez suggests, “Using white as your foundation helps neon pigments reach their full vibrancy potential.” After applying the white base, we’re going to layer our chosen neon shade – think electric blue, hot pink, or acid yellow – and let it dry completely.
For the cloud designs, we’ll use a thin detail brush dipped in white gel polish, creating wispy, cotton-candy-like formations that float across each nail. Professional nail tech Sarah Chen recommends, “Work with a steady hand and build your clouds gradually, using small, connecting circles as your framework.” We’re seeing amazing results when combining multiple neon shades, like pairing ultraviolet with lime green for an aurora borealis effect.
Don’t forget to seal your creation with a high-shine top coat, which will enhance the neon’s glow while protecting your artistic masterpiece for up to two weeks.
Ombre Cloud Effects

For the cloud details, we’ll use a small dotting tool or thin brush to create wispy shapes where the white meets your base color. Don’t worry about perfection – clouds aren’t uniform in nature.
We recommend using OPI’s Alpine Snow for the clouds and Essie’s Salt Water Happy for the perfect sky-blue base. Seal your masterpiece with a quick-dry top coat, and you’ll have Instagram-worthy ombre clouds that look professionally done.
Stormy Night Clouds

Professional nail technician James Roberts suggests, “Don’t aim for perfection – real storm clouds are chaotic and irregular.”
We can seal our stormy masterpiece with a high-shine top coat, which will also help blend the layers seamlessly together.
Frequently Asked Questions
How Long Do Cloud Nail Designs Typically Last Before Chipping?
We’ll typically see cloud nail designs last 1-2 weeks with proper application and a quality top coat. If you’re using gel polish, they’ll stay chip-free even longer – up to 3 weeks.
Can Cloud Nail Designs Be Done at Home Without Professional Tools?
Yes, we can create cloud nail designs at home using simple tools like dotting tools or toothpicks. We’ll just need regular nail polish, a base coat, top coat, and some patience for practice.
What Base Coat Works Best for Long-Lasting Cloud Nail Art?
We recommend using a ridge-filling base coat that’s rubberized or grips polish well. Our favorites include Orly Bonder, OPI Natural Nail Base Coat, or CND Stickey Base Coat for lasting cloud designs.
Are Cloud Nail Designs Suitable for Short Natural Nails?
Yes, we can create beautiful cloud designs on short natural nails! Let’s go with smaller, delicate clouds that won’t overwhelm your nail length. We’ve found they look just as charming as they do on longer nails.
How Much Do Professional Cloud Nail Designs Usually Cost at Salons?
We’ve found that cloud nail designs at salons typically cost between $45-75, depending on your location and salon. They’re usually priced higher than basic manicures since they require extra time and artistic skill.
Conclusion
We’ve explored nine enchanting cloud nail designs that can transform your everyday manicure into a dreamy masterpiece. Whether you’re drawn to classic blue and white patterns or daring neon creations, there’s a cloud design that’ll match your style. Remember, achieving these looks takes practice, but with patience and the right tools – particularly a fine detail brush and quality white polish – you’ll be creating Instagram-worthy cloud manicures in no time.