Let’s explore how we’ll elevate our Thanksgiving style in 2025 with nail designs that perfectly capture the warmth and charm of the season. We’ve curated a collection of 25 stunning nail art ideas that range from subtle harvest-inspired patterns to show-stopping holiday masterpieces. Whether you’re drawn to classic autumn leaves painted in rich burgundies and golds, or you prefer modern interpretations with metallic accents and geometric twists, there’s something here for every style preference. As we share these creative concepts, you’ll discover how to transform your manicure into a festive conversation starter that’ll complement your holiday celebrations.
Classic Fall Leaves

When it comes to Thanksgiving nail art, classic fall leaves create an instantly recognizable seasonal look. We’re seeing nail artists everywhere incorporate rich oranges, deep reds, and golden yellows to capture autumn’s signature palette on their clients’ nails.
“The key to realistic-looking leaf designs is layering your colors,” explains Sarah Chen, celebrity nail artist with 15 years of experience. We’ll want to start with a neutral base coat like OPI’s “Bare My Soul” before building our leaf designs. Using thin brushes, we’ll create leaf outlines with darker shades like Essie’s “Playing Koi” or CND’s “Dark Dahlia,” then fill them in with gradient effects.
For the perfect maple leaf pattern, we’re using a dotting tool to create the center point, then drawing five pointed sections outward. Don’t worry if they’re not perfect – natural leaves have variations! We’ll add veining details with a fine-line brush, and seal everything with a quick-dry top coat. Pro tip: adding a matte finish to some leaves while keeping others glossy creates depth and dimension that nail expert Maria Torres calls “autumn magic in miniature.”
Pumpkin Spice Swirls

Three swirling shades of orange, cinnamon, and cream combine to create the popular pumpkin spice nail art trend that’s taking over social media this season. We’re seeing nail artists everywhere use this mesmerizing marble effect to capture autumn’s coziest flavor palette in a wearable design.
To achieve this look, we’ll start with a neutral base coat before working with OPI’s “Crawfishin’ for a Compliment,” Essie’s “Playing Koi,” and Sally Hansen’s “Bare It All.” Celebrity nail artist Maria Rodriguez explains, “The key is to work quickly while the polish is wet, using a thin nail art brush to create gentle swirls that blend seamlessly together.”
Let’s apply small dots of each shade close together, then use a dotting tool or toothpick to draw them together in circular motions. Don’t worry if your first attempt isn’t perfect – the beauty of this design lies in its organic, free-flowing nature. We recommend sealing your masterpiece with a high-gloss top coat like Seche Vite to enhance the dimensional effect. According to Rodriguez, “The glossy finish really makes those autumn-inspired swirls pop, creating depth that catches the light beautifully.”
Harvest Gold Glitter

A dash of golden sparkle elevates any Thanksgiving manicure from basic to breathtaking. We’re loving how harvest gold glitter adds warmth and dimension to fall nail designs, especially when layered strategically. “The key is building depth with different particle sizes of gold glitter,” explains celebrity nail artist Maria Chen, who’s worked with top influencers during holiday seasons.
Let’s create this look using a combination of fine and chunky gold glitters. We’ll start with OPI’s “All That Glitters Is Gold” as our base, followed by Essie’s “Summit of Style” for larger sparkle pieces. To nail the harvest vibe, we’re focusing the chunkier glitter at the tips, creating an elegant gradient that catches light beautifully. Pro tip: Apply a clear gel top coat between layers to prevent texture and guarantee longevity.
For maximum impact, pair this design with matte accent nails in deep burgundy or forest green. “The contrast between sparkle and matte finishes creates visual interest that’s perfect for Thanksgiving gatherings,” notes Julie Park, lead educator at The Nail Academy. Don’t forget to seal everything with two layers of quick-dry top coat.
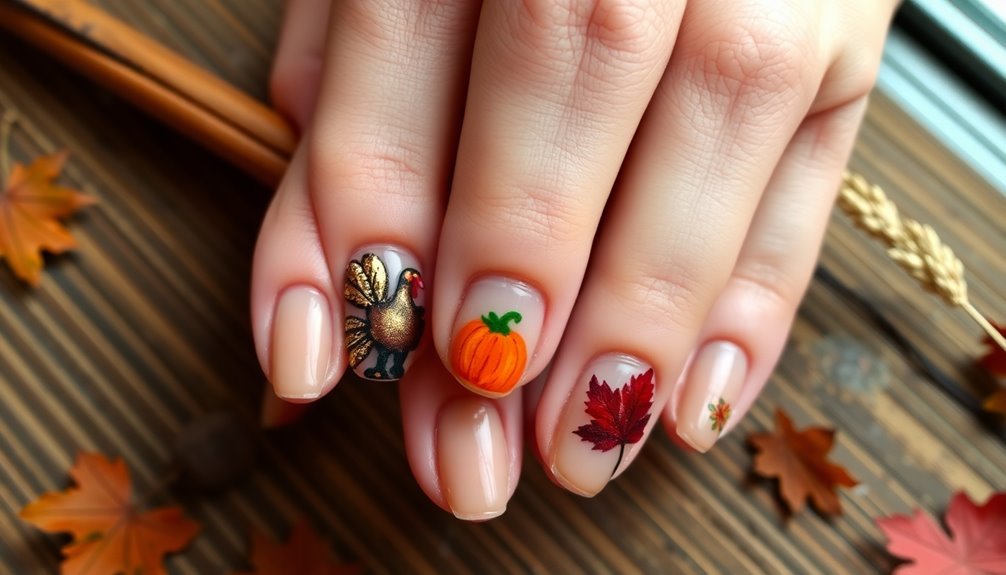
Turkey Accent Nails

The key to a professional-looking turkey accent nail is layering,” explains licensed nail technician Sarah Chen, who recommends using a dotting tool for the turkey’s face details.
We’ll finish with googly eyes using white and black nail polish, and don’t forget the tiny red wattle! A high-quality top coat, like Seche Vite, seals our design and adds remarkable shine. Remember to let each layer dry completely before adding the next element.
Plaid Autumn Pattern

Plaid patterns capture autumn’s cozy essence perfectly on accent nails. “Traditional plaid designs evoke warmth and sophistication when executed in seasonal shades,” says celebrity nail artist Maria Chen, who’s created looks for multiple fashion weeks. We’re loving the combination of burnt orange, deep burgundy, and forest green to achieve that classic fall plaid vibe.
To create this intricate pattern, we’ll start with a neutral beige base coat, letting it dry completely. Using a thin striping brush, create your first set of horizontal lines in your darkest shade, spacing them evenly. “The key to perfect plaid is patience and precision,” notes Chen. Next, we’ll add vertical lines in a lighter complementary color, creating that signature crisscross effect. For added dimension, we recommend using OPI’s “Good Girls Gone Plaid” or Essie’s “Playing Koi” as accent colors.
Don’t worry if your lines aren’t perfectly straight at first – practice makes perfect! Pro tip: seal your design with a quick-dry top coat that won’t smear your artwork, like Seche Vite’s Professional Formula. This protective layer will help your plaid pattern last through all your fall festivities.
Cornucopia Design

Bursting with autumn’s bounty, cornucopia nail designs symbolize the heart of Thanksgiving celebrations. We’re seeing this classic holiday motif reimagined on nails through delicate hand-painted details and creative gradient techniques that capture the essence of abundance.
Let’s create this intricate design using a neutral base like OPI’s “Bare My Soul” as our canvas. We’ll start by sketching the cornucopia’s curved horn shape with Essie’s “Brown Betty,” then layer fruits and vegetables using dotting tools and a fine detail brush. “The key to a realistic cornucopia design is building depth through strategic color placement,” explains celebrity nail artist Maria Chen.
We’re loving how the tiny pumpkins, grapes, and wheat stalks come to life using CND’s fall collection shades. For best results, we’ll seal each layer with a quick-dry topcoat before adding the next element. Don’t forget to add subtle highlights using a white striper brush – it’s these small touches that make the design pop. As master nail technician James Lee notes, “The cornucopia’s success lies in its organized chaos; each element should flow naturally from the horn’s opening.”
Maple Ombre Effect

Cascading like autumn leaves, maple ombre nails capture the gradual color transformation we see in nature during fall. We’ll start with a warm honey-gold base color, then blend through rich amber and deep burgundy shades to create that perfect fall changeover. “The key to a flawless maple ombre is working with the polish while it’s still tacky,” explains Sarah Chen, lead educator at The Nail Academy.
Let’s begin by applying OPI’s “Worth a Pretty Penne” as our base coat, followed by strategic drops of “Chocolate Moose” and “Big Apple Red” near the tips. We’ll use a small makeup sponge to dab and blend these shades together while they’re wet. Celebrity nail artist Maria Lopez recommends “using quick, light tapping motions to achieve that seamless gradient effect.” Don’t forget to seal your design with a high-gloss top coat – we love Seche Vite for its glass-like finish. For added dimension, we can dust a fine copper shimmer powder over the tips before the final top coat sets. The result? A sophisticated take on fall’s signature colors that’ll have everyone at the Thanksgiving table asking about your nails.
Grateful Script Art

Elegant cursive lettering on top of neutral bases creates stunning Thanksgiving nail art that expresses gratitude in style. We’ll show you how to achieve this sophisticated look using a fine-line nail brush and metallic polish, perfect for expressing thankfulness during the holiday season.
Start with a matte beige or cream base coat, allowing it to dry completely before adding your script. “The key to crisp lettering is patience with your base layer,” explains celebrity nail artist Maria Chen. We recommend using OPI’s Pale to the Chief or Essie’s Sand Tropez as your foundation.
Next, load your detail brush with a metallic gold polish like Sally Hansen’s Golden-I, and practice writing “grateful” or “thanks” on paper before attempting it on nails. When you’re ready, carefully script your chosen word across one or two accent nails, keeping your hand steady and movements fluid. “Hold the brush like you’re writing with a pen, maintaining consistent pressure,” advises Chen. For best results, we suggest starting with larger nails like thumbs or ring fingers, where you’ll have more space to work with.
Acorn and Oak Details

Natural whimsy comes alive with acorn and oak leaf designs that capture autumn’s essence on your nails. We’re seeing more nail artists incorporate these woodland-inspired elements using a mix of traditional and innovative techniques that’ll make your manicure stand out at the Thanksgiving table.
Let’s start with a neutral base coat – we recommend OPI’s “Bare My Soul” or Essie’s “Sand Tropez” – before creating tiny acorns using a detailing brush. “The key to realistic acorn details is building layers,” says celebrity nail artist Maria Chen. “Start with a brown dome shape, then add the textured cap using a dotting tool.”
For oak leaves, we’ll use a thin striper brush to draw delicate veining patterns in autumn shades like copper and gold. Don’t forget to seal your design with a high-quality top coat that won’t smudge the intricate details.
Pro tip: Mix a drop of bronze shimmer powder with your clear top coat to give your acorns a subtle metallic finish. Leading nail educator Sarah Thompson notes, “This technique adds dimension while keeping the design sophisticated and seasonally appropriate.”
Rustic Brown Marbling

Transfer the marble pattern using a silicone stamper, working quickly before the polish sets. We’ll seal everything with a matte top coat to enhance that earthy, rustic feel.
For added dimension, try dropping tiny dots of metallic copper polish into your marble mix – it’ll catch the light beautifully without overwhelming the organic pattern.
Pilgrim Hat Tips

While our marbled nails capture autumn’s essence, let’s shift our focus to creating charming pilgrim hat tips. These iconic black-and-gold designs, which master nail artist Sarah Chen calls “sophisticated holiday storytelling,” transform your nail tips into miniature historical fashion statements.
We’ll start by applying a matte black polish to the top third of each nail, creating the hat’s crown. Celebrity manicurist Lisa Wong recommends OPI’s “Black Onyx” for its excellent coverage, saying, “It’s the perfect base for detailed holiday work.”
Next, we’ll add a thin gold stripe using a striping brush and Essie’s “Good as Gold” to create the hat’s buckle, keeping the lines crisp and even.
For the finishing touch, we’ll seal everything with a quick-dry top coat, but here’s a pro tip: “Apply the top coat in two thin layers rather than one thick coat to prevent smudging the design,” advises nail educator Maria Santos. Remember to let each layer dry completely before adding the next, and we’ll have perfectly crafted pilgrim hats that’ll make your Thanksgiving manicure truly memorable.
Cranberry and Gold

Don’t forget to seal your masterpiece with a high-shine top coat like Seche Vite, which will protect your design and enhance the metallic elements.
If you’re feeling adventurous, we can add tiny gold studs at the base of each nail, but remember – with this color combo, less is definitely more.
The result? A sophisticated take on traditional Thanksgiving colors that’ll move, shift, or segue beautifully into winter festivities.
Autumn Vine Pattern

For those seeking a more intricate design, let’s explore the elegant autumn vine pattern. This sophisticated look requires a neutral base coat, like OPI’s “Barefoot in Barcelona,” before we begin creating delicate vine work that captures fall’s essence.
“Vine patterns are trending this season because they perfectly balance sophistication with seasonal charm,” says celebrity nail artist Maria Chen, who’s designed for multiple fashion weeks. We’ll start by using a thin striping brush to draw curved lines in a deep copper shade, like Essie’s “Playing Koi,” creating gentle arcs across each nail.
Next, we’ll add tiny leaves using a dotting tool with CND’s “Crimson Grove” and China Glaze’s “Out on Safari.”
To master this design, we recommend practicing the vine pattern on paper first, as nail expert Sarah Thompson suggests: “The key is maintaining consistent pressure while drawing the curves.” Don’t forget to seal your artwork with a quick-dry top coat, and consider adding small golden dots where the vines intersect for extra sparkle. This design typically lasts 7-10 days with proper application and care.
Wishbone Accent

For the wishbone shape itself, we’ll start at the nail’s center, creating two curved lines that meet at a point, then add the characteristic V-shaped split at the bottom. Don’t worry if it’s not perfect – a dotting tool can help clean up any wobbles.
Finish with a quick-dry topcoat like Seche Vite to seal your design and add shine. Remember, this accent looks best when paired with solid-colored nails on your other fingers.
Wheat Stalk Design

Let’s create this look using a fine-line brush and three key shades: a warm beige base (we recommend OPI’s “Sand in My Suit”), golden yellow for the wheat kernels (try Essie’s “Good as Gold”), and a light brown for the delicate stalks (China Glaze’s “Desert Sun” works perfectly). We’ll start by applying the beige base coat, letting it dry completely before drawing thin, curved lines with the brown shade. Next, we’ll add tiny dots along these lines using the golden yellow polish, creating that characteristic wheat kernel effect.
“The key is to maintain a slight curve in your stalks and vary their heights,” notes professional manicurist James Lin, who’s created these designs for multiple fashion shows. For added depth, we’ll finish with a matte top coat, which gives the design a more natural, harvest-ready appearance.
Fall Floral Arrangement

For the leaves, we’ll mix forest green with touches of yellow to achieve that transitional autumn look. We’re using a dotting tool to create berry accents between the flowers, which adds dimension and interest.
Top it all off with a matte finish topcoat – it’ll give your design that soft, velvety appearance that’s signature to fall flowers. Remember to seal the edges of your nails to guarantee your artwork lasts through all your holiday festivities.
Thanksgiving Sweater Pattern

For the classic argyle pattern, we’ll create diagonal lines using Essie’s “Playing Koi” and seal them with tiny white dots at each intersection. Don’t forget to add micro-patterns between the main designs – tiny crosses, dots, or chevrons work perfectly.
After you’ve completed the pattern work, seal everything with a thick top coat to give your nails that cozy, knitted texture effect. These sweater-inspired nails typically last 7-10 days with proper application and care.
Matte Autumn Colors

For a modern twist, we’re loving the combination of matte and glossy finishes on alternate nails, using colors like Smith & Cult’s “Dark Like Me” and Zoya’s “Courtney.” Don’t forget to prep your nails with a gentle buff and clean, as manicurist David Hong reminds us that “matte formulas tend to highlight any surface imperfections.”
These autumn-inspired shades will perfectly complement your Thanksgiving festivities while staying on-trend.
Native American Patterns

For authentic geometric looks, we’re using dotting tools to create repeating diamond shapes across each nail. Remember to seal your design with a top coat that won’t smear the intricate work – we love Seche Vite’s quick-dry formula for this.
As nail educator Lisa Thompson notes, “The key is keeping designs abstract rather than copying specific tribal patterns, focusing instead on celebrating the beauty of geometric shapes.”
Pumpkin Patch Art

Don’t forget to add whimsical details like tiny leaves and curling vines – these elements bring our pumpkin patch to life.
“The key to realistic-looking pumpkins is adding shadows beneath each one,” explains Sarah Chen, lead educator at The Nail Academy. We’ll achieve this using a light brown polish, like Essie’s “Light as Linen,” applied sparingly with our smallest dotting tool.
Harvest Moon Designs

Don’t forget to add tiny stars using a fine-tipped brush and silver polish – we love Essie’s “No Place Like Chrome” for this step. Seal your celestial masterpiece with a high-shine top coat, and you’ll have nails that reflect the season’s most magical moments.
As nail technician Sarah Chen notes, “The harvest moon design works particularly well on longer nails, where you can really showcase the full gradient effect.”
Fall Forest Scene

Creating a fall forest scene on your nails captures the enchanting beauty of autumn woodlands in miniature. We’ll help you design a multi-nail masterpiece that features towering trees, falling leaves, and rich autumn colors that’ll make your manicure stand out at any Thanksgiving gathering.
Start with a warm beige base coat like OPI’s “Bare My Soul” for the perfect forest backdrop. Once dry, we’ll use a thin striping brush to paint dark brown tree trunks using Essie’s “Little Brown Dress.” As celebrity nail artist Maria Thompson notes, “The key to realistic trees is varying the thickness and adding tiny branches.”
Next, we’ll create the canopy using a dotting tool and autumn shades like China Glaze’s “Orange You Glad” and “Burgundy Away.” For falling leaves, use a small detail brush to paint delicate maple and oak leaf shapes.
Professional nail technician Sarah Chen recommends, “Seal your forest scene with two layers of quick-dry topcoat, applying each layer carefully to prevent smudging.” Don’t forget to add small woodland creatures or a tiny cabin in the distance for that extra special touch.
Autumn Leaf Confetti

For the finishing touches, we’ll add dimension with metallic gold accents (Essie’s “Good as Gold” works beautifully) and seal everything with a quick-dry top coat. Professional nail technician Sarah Chen suggests “applying the top coat in two thin layers to protect your detailed work without smudging.”
This design typically lasts 7-10 days with proper care, making it perfect for all your Thanksgiving festivities, from casual friendsgiving gatherings to formal family dinners.
Thanksgiving Table Setting

Let’s start by applying two thin coats of the base color, then use a detail brush to paint tiny circular plates with China Glaze’s “White on White.” For the metallic silverware accents, we’re reaching for Essie’s “No Place Like Chrome” and a super-fine striping brush. Don’t forget to add microscopic cranberry sauce dollops using Morgan Taylor’s “Red Romance” – it’s these tiny details that make the design pop.
As celebrity nail artist Tom Bachik notes, “The key to realistic mini table settings is maintaining proper scale and spacing between elements.” We’ll finish with strategically placed bronze micro-glitter to suggest candlelight shimmer, sealing everything with a quick-dry top coat that won’t smear our detailed work.
Also Read: 27 November Nail Ideas to Welcome the Cozy Vibes
Golden Hour Gradient

The warm glow of autumn inspires this stunning gradient design that mimics the rich colors of a Thanksgiving sunset. We’ll create this look using a blend of warm metallic shades, starting with a deep bronze at the cuticle that shifts seamlessly into burnished gold at the tips.
Let’s begin with OPI’s base coat “Natural Nail,” which celebrity nail artist Tom Bachik says “creates the perfect canvas for gradient work.” We’ll apply our first shade, Essie’s “Penny Talk,” near the cuticle, followed by CND’s “Brass Button” in the middle, and finish with Sally Hansen’s “Golden-I” at the tips. Using a makeup sponge, we’ll dab these colors together while they’re still wet to achieve that seamless fade effect.
“The key to perfect gradients lies in the layering technique,” explains nail educator Sarah Chen, who recommends “applying thin coats and building up the intensity gradually.” We’ll seal our masterpiece with a high-shine top coat, letting each layer dry completely. For added dimension, we can dust a fine shimmer powder over the final layer, creating that magical golden hour effect that’ll have everyone at the Thanksgiving table asking about our nails.
Frequently Asked Questions
How Long Do Thanksgiving Nail Designs Typically Last Before Chipping?
We typically see Thanksgiving nail designs last 1-2 weeks with proper nail prep and a quality top coat. If you’re using regular polish, expect 5-7 days, while gel designs can stay chip-free for 2-3 weeks.
Can These Nail Designs Be Done With Regular Polish at Home?
Yes, we can create Thanksgiving nail designs at home with regular polish! While they won’t be as intricate as salon versions, simple patterns like dots, stripes, or leaves are totally doable using basic polishes and tools.
What Base Coat Works Best for Fall Glitter Nail Designs?
We recommend using a ridge-filling base coat that’s slightly tacky, like OPI Natural Nail or Orly Bonder, for glitter designs. They’ll help your sparkles stick better and create a smooth canvas for application.
Are These Designs Suitable for Natural Nails or Only Acrylics?
We can use these designs on both natural and acrylic nails! For natural nails, we’ll want to apply a strengthening base coat first. If you’ve got shorter nails, let’s stick to simpler patterns.
How Much Do Professional Thanksgiving Nail Designs Usually Cost at Salons?
We’ll typically see Thanksgiving nail designs at salons ranging from $45-85 for a full set. The price depends on design complexity, salon location, and whether you’re getting regular polish or gel.
Conclusion
We’ve explored these stunning Thanksgiving nail designs that’ll help you make a statement at your 2025 holiday gatherings. From classic autumn leaves to intricate turkey accent nails, there’s something for every skill level and style preference. Remember, while perfecting these looks takes practice, the right tools and patience will help you achieve professional-quality results. Let’s embrace the season’s warmth with these festive nail art ideas that celebrate everything we love about Thanksgiving.